Jump to content

Sky Slate Blueberry Blackcurrant Watermelon Strawberry Orange Banana Apple Emerald Chocolate
Photo

GDI+ standard library 1.45 by tic


  • Please log in to reply
1385 replies to this topic
rulfzid
  • Members
  • 62 posts
  • Last active: Mar 11 2011 08:31 PM
  • Joined: 27 Nov 2008
So I've been playing around with this a little bit more (thanks tic for the help). An interesting thing is the TweakUI alttab switcher seems to use PrintWindow to display its screengrabs, because it only show a titlebar when a window is minimized.

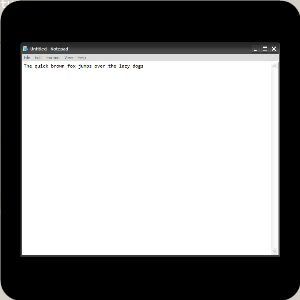
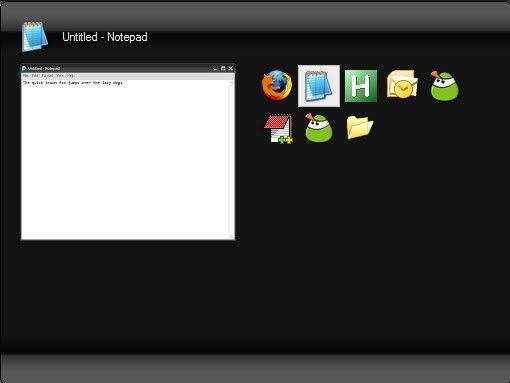
However, the picture quality of the tweakui window seems to be better than what i'm getting (see below, the picture is smaller, but more legible).

Any ideas as to why this is or how I can improve the picture quality? (the code i'm using is below the pictures)

Posted ImagePosted Image

#SingleInstance, Force
#NoEnv
SetBatchLines, -1

; Uncomment if Gdip.ahk is not in your standard library
;#Include, Gdip.ahk

; Start gdi+
If !pToken := Gdip_Startup()
{
   MsgBox, 48, gdiplus error!, Gdiplus failed to start. Please ensure you have gdiplus on your system
   ExitApp
}
OnExit, Exit

; Set the width and height we want as our drawing area, to draw everything in. This will be the dimensions of our bitmap
Width := 300, Height := 300

; Create a layered window (+E0x80000 : must be used for UpdateLayeredWindow to work!) that is always on top (+AlwaysOnTop), has no taskbar entry or caption
Gui, 1: -Caption +E0x80000 +LastFound +AlwaysOnTop +ToolWindow +OwnDialogs

; Show the window
Gui, 1: Show, NA

; Get a handle to this window we have created in order to update it later
hwnd1 := WinExist()

; Create a gdi bitmap with width and height of what we are going to draw into it. This is the entire drawing area for everything
hbm := CreateDIBSection(Width, Height)

; Get a device context compatible with the screen
hdc := CreateCompatibleDC()

; Select the bitmap into the device context
obm := SelectObject(hdc, hbm)

; Get a pointer to the graphics of the bitmap, for use with drawing functions
G := Gdip_GraphicsFromHDC(hdc)

; Set the smoothing mode to antialias = 4 to make shapes appear smother (only used for vector drawing and filling)
Gdip_SetSmoothingMode(G, 4)

; Create a partially transparent, black brush (ARGB = Transparency, red, green, blue) to draw a rounded rectangle with
pBrush := Gdip_BrushCreateSolid(0xFF000000)

; Fill the graphics of the bitmap with a rounded rectangle using the brush created
; Filling the entire graphics - from coordinates (0, 0) the entire width and height
; The last parameter (20) is the radius of the circles used for the rounded corners
Gdip_FillRoundedRectangle(G, pBrush, 0, 0, Width, Height, 20)

; Delete the brush as it is no longer needed and wastes memory
Gdip_DeleteBrush(pBrush)

; Get notepad screengrab
WinGet, hNotepad, ID, Untitled - Notepad
WinGetPos, , , nw, nh, ahk_id %hNotepad%
if (nw > nh)
{
	gw := Width - 40
	gh := (Width - 40) * (nh/nw)
	gx := 20
	gy := 20 + floor((Width - 40 - gh)/2)
}
else
{
	gw := (Width - 40) * (nw/nh)
	gh := Width - 40
	gx := 20 + floor( (Width - 40 - gw) / 2 )
	gy := 20
}

pNotepadBitmap := Gdip_BitmapFromHWND(hNotepad)

Gdip_DrawImage(G, pNotepadBitmap, gx, gy, gw, gh, 0, 0, nw, nh)


; Update the specified window we have created (hwnd1) with a handle to our bitmap (hdc), specifying the x,y,w,h we want it positioned on our screen
; With some simple maths we can place the gui in the centre of our primary monitor horizontally and vertically at the specified heigth and width
UpdateLayeredWindow(hwnd1, hdc, (A_ScreenWidth-Width)//2, (A_ScreenHeight-Height)//2, Width, Height)

; By placing this OnMessage here. The function WM_LBUTTONDOWN will be called every time the user left clicks on the gui
OnMessage(0x201, "WM_LBUTTONDOWN")


; Select the object back into the hdc
SelectObject(hdc, obm)

; Now the bitmap may be deleted
DeleteObject(hbm)
DeleteObject(hbm_notepad)

; Also the device context related to the bitmap may be deleted
DeleteDC(hdc)
DeleteDC(hdc_notepad)

; The graphics may now be deleted
Gdip_DeleteGraphics(G)
Return

;#######################################################################

; This function is called every time the user clicks on the gui
; The PostMessage will act on the last found window (this being the gui that launched the subroutine, hence the last parameter not being needed)
WM_LBUTTONDOWN()
{
   PostMessage, 0xA1, 2
}

;#######################################################################

Exit:
; gdi+ may now be shutdown on exiting the program
Gdip_Shutdown(pToken)
ExitApp
Return

Gdip_BitmapFromHWND(hwnd)
{
   WinGetPos,,, Width, Height, ahk_id %hwnd%
   hbm := CreateDIBSection(Width, Height), hdc := CreateCompatibleDC(), obm := SelectObject(hdc, hbm)
   PrintWindow(hwnd, hdc)
   pBitmap := Gdip_CreateBitmapFromHBITMAP(hbm)
   SelectObject(hdc, obm), DeleteObject(hbm), DeleteDC(hdc)
   Return, pBitmap
}

PrintWindow(hwnd, hdc, Flags=0)
{
   Return, DllCall("PrintWindow", "UInt", hwnd, "UInt", hdc, "UInt", Flags)
}


tic
  • Members
  • 1934 posts
  • Last active: May 30 2018 08:13 PM
  • Joined: 22 Apr 2007

Any ideas as to why this is or how I can improve the picture quality?


Tutorial 3. Gdip_SetInterpolationMode(G, 7)

rulfzid
  • Members
  • 62 posts
  • Last active: Mar 11 2011 08:31 PM
  • Joined: 27 Nov 2008

Tutorial 3. Gdip_SetInterpolationMode(G, 7)


That's the kindest "RTFM" I've ever seen. Thank you, and I should probably take the time to dig into the documentation a little bit more.

Lexikos
  • Administrators
  • 9844 posts
  • AutoHotkey Foundation
  • Last active:
  • Joined: 17 Oct 2006

Do you know of anyway to capture a minimized window?

Unminimize it... there's no other way.

Frankie
  • Members
  • 2930 posts
  • Last active: Feb 05 2015 02:49 PM
  • Joined: 02 Nov 2008
Take pics of them when there open so you don't have to unminimize all of them. For example you have 5 windows open (Window 1, 2, 3, 4 and 5). Say from the time the script runs you activate 1, 2, and 4. By taking pics of those three right before there minimized you only have to unminimize 3 and 5. But keeping all of them in there current state would be better. Windows Vista somehow does it. When you put your cursor over a minimized window you see a real time view of the window.
aboutscriptappsscripts
Request Video Tutorials Here or View Current Tutorials on YouTube
Any code ⇈ above ⇈ requires AutoHotkey_L to run

Lexikos
  • Administrators
  • 9844 posts
  • AutoHotkey Foundation
  • Last active:
  • Joined: 17 Oct 2006

When you put your cursor over a minimized window you see a real time view of the window.

Nope. I forget the exact details, but essentially you are seeing a stale copy from before the window was minimized.

Vista thumbnails directly mirror the surface in video memory which the appropriate window draws onto. Likewise for Windows Flip (Win+Tab).

infogulch
  • Moderators
  • 717 posts
  • Last active: Jul 31 2014 08:27 PM
  • Joined: 27 Mar 2008
you could try hooking the shell and take a picture of each window just before it's minimized.

mosaic (as guest)
  • Guests
  • Last active:
  • Joined: --

When you put your cursor over a minimized window you see a real time view of the window.

Nope. I forget the exact details, but essentially you are seeing a stale copy from before the window was minimized.
...


Not always, if you are using Windows Media Player playing videos, for example, the minimized windows actually display in real-time the video contents.

Lexikos
  • Administrators
  • 9844 posts
  • AutoHotkey Foundation
  • Last active:
  • Joined: 17 Oct 2006

Source: Greg Schechter's Blog - Redirecting GDI, DirectX, and WPF applications
Minimized windows present a special issue. Typically when an application receives a minimization, the surface that it's asked to paint is a nominal size, like 130x30, just enough for shades of the non-client area. If the application updates the system memory surface at this point, and we continue our copying to the video memory surface, then any surface we may have had available to us for Flip3D or for thumbnail rendering is suddenly gone. Instead of doing this, we maintain the video memory surface in its last known state, and thus those "secondary window representations" are far more useful when windows are minimized.

I suppose WMP renders directly to the window's video memory surface rather than implicitly drawing onto the system memory surface like most applications. (The above blog post explains that each window has a surface in system memory and a surface in video memory. The latter is used for live thumbnails.)

Edit:
Using GetDC and BitBlt to copy the image of the window should be much more efficient and reliable than PrintWindow for layered or composited windows. Pseudo-code follows:
WinGet, Style, Style ; Uses Last Found Window.
if ((Style & (WS_EX_LAYERED:=0x80000))
    || (!DllCall("dwmapi\DwmIsCompositionEnabled","int*",DwmIsEnabled) && DwmIsEnabled))
    Use BitBlt
else
    Use PrintWindow
This still won't work around the problem of minimize windows, as BitBlt accesses the system memory surface, which contains an image of the minimized window.

Using BitBlt on WMP (while not minimized) on Vista shows no video. This demonstrates that WMP does indeed render video directly to the video memory surface. I wish I knew how...

VxE
  • Moderators
  • 3622 posts
  • Last active: Dec 24 2015 02:21 AM
  • Joined: 07 Oct 2006

I wish I knew how...

You're not alone there...

Anyways, here's a fun fact related to WMP (and media players in general). While the video window is visible and playing video, take a screenshot (with the [prtsc] button) then paste it into the image editor of your choice. You'll notice that where the video should be, there is either black or no data (you can see through to the desktop on some image editors). OK, now, in your [Display Settings], go to the [Settings] tab and click the [Advanced] button (this is on XP... not sure about vista), then in the new window, go to the [TroubleShoot] tab where there should be a slider captioned "Hardware Acceleration". Move it from "full" to "none" and save the changes. Now go back to your video and try taking another screenshot and pasting to an image editor. You should be able to see the piece of the video that you captured!

Lexikos
  • Administrators
  • 9844 posts
  • AutoHotkey Foundation
  • Last active:
  • Joined: 17 Oct 2006
Even if such an option exists in Vista, Aero requires hardware acceleration.

In XP - with hardware acceleration - it is evident WMP uses a hardware overlay.

WMP probably uses DirectShow. If hardware acceleration is disabled, DirectShow goes through software. On Vista, DirectShow renders into a window's surface rather than using a hardware overlay.

However, Media Player Classic also uses DirectShow. As with WMP, BitBlt does not get the video. Unlike WMP, the thumbnail does not continue to update if you minimize the window. There are many possibilities, including: MPC stops rendering when minimized, while WMP doesn't; WMP has special access to the DWM...

End speculation.

Btw, I used LiveWindows to test BitBlt by replacing the PrintWindow call with:
hdc_win := DllCall("GetDC" ,"uint",task_id)
DllCall("BitBlt" ,"uint",hdc_buffer ,"int",0,"int",0 ,"int",w,"int",h ,"uint",hdc_win ,"int",0,"int",0 ,"uint",0xCC0020)
DllCall("ReleaseDC" ,"uint",task_id ,"uint",hdc_win)


tic
  • Members
  • 1934 posts
  • Last active: May 30 2018 08:13 PM
  • Joined: 22 Apr 2007
Version 1.26 released

Most notable thanks with this release go to infogulch for catching a bug in Gdip_SaveBitmapToFile where it would not work if the script was in hex mode. Thanks also to nick for his idea of allowing a vcentre in Gdip_TextToImage. Also to DerRaphael for his continued efforts with literally everything!

Notable new features are:

The ability to use gradients as demonstrated in the script below. Gdip_CreateLineBrush and Gdip_CreateLineBrushFromRect may be used

Modifications to Gdip_TextToImage allowing the user to specify the vertical position of the text using Top|Up|Bottom|Down|vCentre|vCenter

The addition of Gdip_BitmapFromHWND to printscreen an hwnd into a bitmap

Gdip_BitmapFromScreen accepts a raster operation for use with BitBlt
#SingleInstance, Force
#NoEnv
SetBatchLines, -1

; Uncomment if Gdip.ahk is not in your standard library
; #Include, Gdip.ahk

; Start gdi+
If !pToken := Gdip_Startup()
{
   MsgBox, 48, gdiplus error!, Gdiplus failed to start. Please ensure you have gdiplus on your system
   ExitApp
}
OnExit, Exit

; Set the width and height we want as our drawing area, to draw everything in. This will be the dimensions of our bitmap
Width := 300, Height := 200

; Create a layered window (+E0x80000 : must be used for UpdateLayeredWindow to work!) that is always on top (+AlwaysOnTop), has no taskbar entry or caption
Gui, 1: -Caption +E0x80000 +LastFound +AlwaysOnTop +ToolWindow +OwnDialogs
Gui, 1: Add, Edit, w%Width% h20 y300, vMeEdit
; Show the window
Gui, 1: Show, NA

; Get a handle to this window we have created in order to update it later
hwnd1 := WinExist()

; Create a gdi bitmap with width and height of what we are going to draw into it. This is the entire drawing area for everything
hbm := CreateDIBSection(Width, Height)

; Get a device context compatible with the screen
hdc := CreateCompatibleDC()

; Select the bitmap into the device context
obm := SelectObject(hdc, hbm)

; Get a pointer to the graphics of the bitmap, for use with drawing functions
G := Gdip_GraphicsFromHDC(hdc)

; Set the smoothing mode to antialias = 4 to make shapes appear smother (only used for vector drawing and filling)
Gdip_SetSmoothingMode(G, 4)

pBrush := Gdip_CreateLineBrush(0, 0, 0, Height, 0xff000000, 0x55ffffff)

; Fill the graphics of the bitmap with a rounded rectangle using the brush created
; Filling the entire graphics - from coordinates (0, 0) the entire width and height
; The last parameter (20) is the radius of the circles used for the rounded corners
Gdip_FillRoundedRectangle(G, pBrush, 0, 0, Width, Height, 20)

; Delete the brush as it is no longer needed and wastes memory
Gdip_DeleteBrush(pBrush)

; We can specify the font to use. Here we use Arial as most systems should have this installed
Font = Arial
; Next we can check that the user actually has the font that we wish them to use
; If they do not then we can do something about it. I choose to give a wraning and exit!
If !Gdip_FontFamilyCreate(Font)
{
   MsgBox, 48, Font error!, The font you have specified does not exist on the system
   ExitApp
}

; There are a lot of things to cover with the function Gdip_TextToGraphics

; The 1st parameter is the graphics we wish to use (our canvas)

; The 2nd parameter is the text we wish to write. It can include new lines `n

; The 3rd parameter, the options are where all the action takes place...
; You can write literal x and y coordinates such as x20 y50 which would place the text at that position in pixels
; or you can include the last 2 parameters (Width and Height of the Graphics we will use) and then you can use x10p
; which will place the text at 10% of the width and y30p which is 30% of the height
; The same percentage marker may be used for width and height also, so w80p makes the bounding box of the rectangle the text
; will be written to 80% of the width of the graphics. If either is missed (as I have missed height) then the height of the bounding
; box will be made to be the height of the graphics, so 100%

; Any of the following words may be used also: Regular,Bold,Italic,BoldItalic,Underline,Strikeout to perform their associated action

; To justify the text any of the following may be used: Near,Left,Centre,Center,Far,Right with different spelling of words for convenience

; The rendering hint (the quality of the antialiasing of the text) can be specified with r, whose values may be:
; SystemDefault = 0
; SingleBitPerPixelGridFit = 1
; SingleBitPerPixel = 2
; AntiAliasGridFit = 3
; AntiAlias = 4

; The size can simply be specified with s

; The colour and opacity can be specified for the text also by specifying the ARGB as demonstrated with other functions such as the brush
; So cffff0000 would make a fully opaque red brush, so it is: cARGB (the literal letter c, follwed by the ARGB)

; The 4th parameter is the name of the font you wish to use

; As mentioned previously, you don not need to specify the last 2 parameters, the width and height, unless
; you are planning on using the p option with the x,y,w,h to use the percentage
Options = Centre vCentre cbbffffff r4 s20 Underline Italic
Gdip_TextToGraphics(G, "This is version 1.26 of the GDI+ library and I hope you like it!", Options, Font, Width, Height)


; Update the specified window we have created (hwnd1) with a handle to our bitmap (hdc), specifying the x,y,w,h we want it positioned on our screen
; With some simple maths we can place the gui in the centre of our primary monitor horizontally and vertically at the specified heigth and width
UpdateLayeredWindow(hwnd1, hdc, (A_ScreenWidth-Width)//2, (A_ScreenHeight-Height)//2, Width, Height)

; By placing this OnMessage here. The function WM_LBUTTONDOWN will be called every time the user left clicks on the gui
OnMessage(0x201, "WM_LBUTTONDOWN")


; Select the object back into the hdc
SelectObject(hdc, obm)

; Now the bitmap may be deleted
DeleteObject(hbm)

; Also the device context related to the bitmap may be deleted
DeleteDC(hdc)

; The graphics may now be deleted
Gdip_DeleteGraphics(G)
Return

;#######################################################################

; This function is called every time the user clicks on the gui
; The PostMessage will act on the last found window (this being the gui that launched the subroutine, hence the last parameter not being needed)
WM_LBUTTONDOWN()
{
   PostMessage, 0xA1, 2
}

;#######################################################################

Exit:
; gdi+ may now be shutdown on exiting the program
Gdip_Shutdown(pToken)
ExitApp
Return

I still have some cool things I want to add, but please inform me of any bugs

Thanks all

philou
  • Members
  • 68 posts
  • Last active: Jan 04 2011 01:12 PM
  • Joined: 26 Jul 2006
Hey tic,
I tried to use the Bitmap::ApplyEffect Method, but ErrorLevel yields -4
(The specified function could not be found inside the DLL)


I alread tried using gdiplus\GdipBitmapApplyEffect, as it's a Bitmap function (or method?), but ErrorLevel stays the same.

Is it possible to use ApplyEffect at all?
Maybe there's something else I missed?

VarSetCapacity(BlurStruct, 8)
NumPut("100", BlurStruct, 0, "Float"), NumPut("1", BlurStruct, 4, "Int")

VarSetCapacity(RectF, 16)
NumPut("0", RectF, 0, "Float"), NumPut("0", RectF, 4, "Float"), NumPut(pBitmapWidth, RectF, 8, "Float"), NumPut(pBitmapHeight, RectF, 12, "Float")

MsgBox, % DllCall("gdiplus\GdipApplyEffect", "UInt", pBitmap, "Int", 1, "UInt", &BlurStruct, "UInt", &RectF, "Int", 0, "UInt*" pBitmap2) "`n" ErrorLevel ;%


Lexikos
  • Administrators
  • 9844 posts
  • AutoHotkey Foundation
  • Last active:
  • Joined: 17 Oct 2006
It seems you missed the "Bitmap" in "GdipBitmapApplyEffect"...

tic
  • Members
  • 1934 posts
  • Last active: May 30 2018 08:13 PM
  • Joined: 22 Apr 2007
It will still yield the same result. Remember we had a look into this Lex and you found out that it is not contained within gdi+ much to my dismay, but is only for microsofts use :(

You might wanna use CreateRectF(ByRef RectF, x, y, w, h) which I included in the lib philou. Thought it might be useful :)