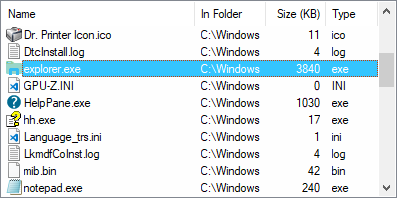
A ListView is one of the most elaborate controls provided by the operating system. In its most recognizable form, it displays a tabular view of rows and columns, the most common example of which is Explorer's list of files and folders (detail view).
A ListView usually looks like this:
Though it may be elaborate, a ListView's basic features are easy to use. The syntax for creating a ListView is:
Gui, Add, ListView, Options, ColumnTitle1|ColumnTitle2|...
Here is a working script that creates and displays a ListView containing a list of files in the user's "My Documents" folder:
; Create the ListView with two columns, Name and Size:
Gui, Add, ListView, r20 w700 gMyListView, Name|Size (KB)

; Gather a list of file names from a folder and put them into the ListView:
Loop, %A_MyDocuments%\*.*
    LV_Add("", A_LoopFileName, A_LoopFileSizeKB)

LV_ModifyCol()  ; Auto-size each column to fit its contents.
LV_ModifyCol(2, "Integer")  ; For sorting purposes, indicate that column 2 is an integer.

; Display the window and return. The script will be notified whenever the user double clicks a row.
Gui, Show
return

MyListView:
if (A_GuiEvent = "DoubleClick")
{
    LV_GetText(RowText, A_EventInfo)  ; Get the text from the row's first field.
    ToolTip You double-clicked row number %A_EventInfo%. Text: "%RowText%"
}
return

GuiClose:  ; Indicate that the script should exit automatically when the window is closed.
ExitApp
AltSubmit: Notifies the script for more types of ListView events than normal. In other words, the g-label is launched more often. See ListView Notifications for details.
Background: Specify the word Background followed immediately by a color name (see color chart) or RGB value (the 0x prefix is optional). Examples: BackgroundSilver, BackgroundFFDD99. If this option is not present, the ListView initially defaults to the background color set by the last parameter of Gui Color (or if none, the system's default background color). Specifying BackgroundDefault applies the system's default background color (usually white). For example, a ListView can be restored to the default color via GuiControl, +BackgroundDefault, MyListView.
C: Text color. Specify the letter C followed immediately by a color name (see color chart) or RGB value (the 0x prefix is optional). Examples: cRed, cFF2211, c0xFF2211, cDefault.
Checked: Provides a checkbox at the left side of each row. When adding a row, specify the word Check in its options to have the box to start off checked instead of unchecked. The user may either click the checkbox or press the spacebar to check or uncheck a row.
Count: Specify the word Count followed immediately by the total number of rows that the ListView will ultimately contain. This is not a limit: rows beyond the count can still be added. Instead, this option serves as a hint to the control that allows it to allocate memory only once rather than each time a row is added, which greatly improves row-adding performance (it may also improve sorting performance). To improve performance even more, use GuiControl, -Redraw, MyListView prior to adding a large number of rows. Afterward, use GuiControl, +Redraw, MyListView to re-enable redrawing (which also repaints the control).
Grid: Provides horizontal and vertical lines to visually indicate the boundaries between rows and columns.
Hdr: Specify -Hdr (minus Hdr) to omit the header (the special top row that contains column titles). To make it visible later, use GuiControl, +Hdr, MyListView.
LV: Specify the string LV followed immediately by the number of an extended ListView style. These styles are entirely separate from generic extended styles. For example, specifying -E0x200 would remove the generic extended style WS_EX_CLIENTEDGE to eliminate the control's default border. By contrast, specifying -LV0x20 would remove LVS_EX_FULLROWSELECT.
LV0x10: Specify -LV0x10 to prevent the user from dragging column headers to the left or right to reorder them. However, it is usually not necessary to do this because the physical reordering of columns does not affect the column order seen by the script. For example, the first column will always be column 1 from the script's point of view, even if the user has physically moved it to the right of other columns.
LV0x20: Specify -LV0x20 to require that a row be clicked at its first field to select it (normally, a click on any field will select it). The advantage of this is that it makes it easier for the user to drag a rectangle around a group of rows to select them.
Multi: Specify -Multi (minus Multi) to prevent the user from selecting more than one row at a time.
NoSortHdr: Prevents the header from being clickable. It will take on a flat appearance rather than its normal button-like appearance. Unlike most other ListView styles, this one cannot be changed after the ListView is created.
NoSort: Turns off the automatic sorting that occurs when the user clicks a column header. However, the header will still behave visually like a button (unless the NoSortHdr option above has been specified). In addition, the g-label will still receive the ColClick notification, to which it can respond with a custom sort or other action.
ReadOnly: Specify -ReadOnly (minus ReadOnly) to allow editing of the text in the first column of each row. To edit a row, select it then press F2 (see the WantF2 option below). Alternatively, you can click a row once to select it, wait at least half a second, then click the same row again to edit it.
R: Rows of height (upon creation). Specify the letter R followed immediately by the number of rows for which to make room inside the control. For example, R10 would make the control 10 rows tall. If the ListView is created with a view mode other than report view, the control is sized to fit rows of icons instead of rows of text. Note: adding icons to a ListView's rows will increase the height of each row, which will make this option inaccurate.
Sort: The control is kept alphabetically sorted according to the contents of the first column.
SortDesc: Same as above except in descending order.
WantF2: In [v1.0.44+], specify -WantF2 (minus WantF2) to prevent F2 from editing the currently focused row. This setting is ignored unless -ReadOnly is also in effect. Regardless of this setting, the g-label still receives F2 notifications.
(Unnamed numeric styles): Since styles other than the above are rarely used, they do not have names. See the ListView styles table for a list.
A ListView has five viewing modes, of which the most common is report view (which is the default). To use one of the other views, specify its name in the options list. The view can also be changed after the control is created; for example: GuiControl, +IconSmall, MyListView.
Icon: Shows a large-icon view. In this view and all the others except Report, the text in columns other than the first is not visible. To display icons in this mode, the ListView must have a large-icon ImageList assigned to it.
Tile: Shows a large-icon view but with ergonomic differences such as displaying each item's text to the right of the icon rather than underneath it. Checkboxes do not function in this view. Also, attempting to show this view on operating systems older than Windows XP has no effect.
IconSmall: Shows a small-icon view.
List: Shows a small-icon view in list format, which displays the icons in columns. The number of columns depends on the width of the control and the width of the widest text item in it.
Report: Switches back to report view, which is the initial default. For example: GuiControl, +Report, MyListView.
All of the following ListView functions operate upon the current thread's default GUI window (which can be changed via Gui, 2:Default). If the default window does not exist or has no ListView controls, all functions return zero to indicate the problem.
If the window has more than one ListView control, by default the functions operate upon the one most recently added. To change this, specify Gui, ListView, ListViewName, where ListViewName is the name of the ListView's associated variable, its ClassNN as shown by Window Spy or in [v1.1.04+] its HWND. Once changed, all existing and future threads will use the indicated ListView. [v1.1.23+]: A_DefaultListView contains the current setting.
When the phrase "row number" is used on this page, it refers to a row's current position within the ListView. The top row is 1, the second row is 2, and so on. After a row is added, its row number tends to change due to sorting, deleting, and inserting of other rows. Therefore, to locate specific row(s) based on their contents, it is usually best to use LV_GetText() in a loop.
Row functions:
Column functions:
Retrieval functions:
Other functions:
Adds a new row to the bottom of the list.
RowNumber := LV_Add(Options, Col1, Col2, ...)
If blank or omitted, it defaults to no options. Otherwise, specify one or more options from the list below (not case-sensitive). Separate each option from the next with a space or tab. To remove an option, precede it with a minus sign. To add an option, a plus sign is permitted but not required.
Check: Shows a checkmark in the row (if the ListView has checkboxes). To later uncheck it, use LV_Modify(RowNumber, "-Check").
Col: Specify the word Col followed immediately by the column number at which to begin applying the parameters Col1 and beyond. This is most commonly used with LV_Modify() to alter individual fields in a row without affecting those that lie to their left.
Focus: Sets keyboard focus to the row (often used in conjunction with the Select option below). To later de-focus it, use LV_Modify(RowNumber, "-Focus").
Icon: Specify the word Icon followed immediately by the number of this row's icon, which is displayed in the left side of the first column. If this option is absent, the first icon in the ImageList is used. To display a blank icon, specify -1 or a number that is larger than the number of icons in the ImageList. If the control lacks a small-icon ImageList, no icon is displayed nor is any space reserved for one in report view.
The Icon option accepts a one-based icon number, but this is internally translated to a zero-based index; therefore, Icon0 corresponds to the constant I_IMAGECALLBACK, which is normally defined as -1, and Icon-1 corresponds to I_IMAGENONE. Other out of range values may also cause a blank space where the icon would be.
Select: Selects the row. To later deselect it, use LV_Modify(RowNumber, "-Select"). When selecting rows, it is usually best to ensure that at least one row always has the focus property because that allows the Apps key to display its context menu (if any) near the focused row. The word Select may optionally be followed immediately by a 0 or 1 to indicate the starting state. In other words, both "Select" and "Select" . VarContainingOne are the same (the period used here is the concatenation operator). This technique also works with the Focus and Check options above.
Vis [v1.0.44+]: Ensures that the specified row is completely visible by scrolling the ListView, if necessary. This has an effect only for LV_Modify(); for example: LV_Modify(RowNumber, "Vis").
The columns of the new row, which can be text or numeric (including numeric expression results). To make any field blank, specify "" or the equivalent. If there are too few fields to fill all the columns, the columns at the end are left blank. If there are too many fields, the fields at the end are completely ignored.
On success, this function returns the new row number, which is not necessarily the last row if the ListView has the Sort or SortDesc style. On failure, it returns 0.
Inserts a new row at the specified row number.
RowNumber := LV_Insert(RowNumber , Options, Col1, Col2, ...)
The row number of the newly inserted row. Any rows at or beneath RowNumber are shifted downward to make room for the new row. If RowNumber is greater than the number of rows in the list (even as high as 2147483647), the new row is added to the end of the list.
If blank or omitted, it defaults to no options. Otherwise, specify one or more options from the list above.
The columns of the new row, which can be text or numeric (including numeric expression results). To make any field blank, specify "" or the equivalent. If there are too few fields to fill all the columns, the columns at the end are left blank. If there are too many fields, the fields at the end are completely ignored.
On success, this function returns the specified row number. On failure, it returns 0.
Modifies the attributes and/or text of a row.
RowNumber := LV_Modify(RowNumber , Options, NewCol1, NewCol2, ...)
The number of the row to modify. If 0, all rows in the control are modified.
If blank or omitted, it defaults to no options. Otherwise, specify one or more options from the list above. The Col option may be used to update specific columns without affecting the others.
The new columns of the specified row, which can be text or numeric (including numeric expression results). To make any field blank, specify "" or the equivalent. If there are too few fields to cover all the columns, the columns at the end are not changed. If there are too many fields, the fields at the end are completely ignored.
On success, this function returns the specified row number. On failure, it returns 0. If RowNumber is 0 to modify all rows, it returns 1 on complete success and 0 if any part of the operation failed.
When only the first two parameters are present, only the row's attributes and not its text are changed.
Deletes the specified row or all rows.
IsDeleted := LV_Delete(RowNumber)
If omitted, all rows in the ListView are deleted. Otherwise, specify the number of the row to delete.
On success, this function returns 1 (true). On failure, it returns 0 (false).
Modifies the attributes and/or text of the specified column and its header.
IsModified := LV_ModifyCol(ColumnNumber, Options, ColumnTitle)
If this and the other parameters are all omitted, the width of every column is adjusted to fit the contents of the rows. This has no effect when not in Report (Details) view.
Otherwise, specify the number of the column to modify. The first column is 1 (not 0).
If omitted, it defaults to Auto (adjusts the column's width to fit its contents). Otherwise, specify one or more options from the list below (not case-sensitive). Separate each option from the next with a space or tab. To remove an option, precede it with a minus sign. To add an option, a plus sign is permitted but not required.
General options:
N: Specify for N the new width of the column, in pixels. This number can be unquoted if is the only option. For example, the following are both valid: LV_ModifyCol(1, 50) and LV_ModifyCol(1, "50 Integer").
Auto: Adjusts the column's width to fit its contents. This has no effect when not in Report (Details) view.
AutoHdr: Adjusts the column's width to fit its contents and the column's header text, whichever is wider. If applied to the last column, it will be made at least as wide as all the remaining space in the ListView. It is usually best to apply this setting only after the rows have been added because that allows any newly-arrived vertical scroll bar to be taken into account when sizing the last column. This has no effect when not in Report (Details) view.
Icon: Specify the word Icon followed immediately by the number of the ImageList's icon to display next to the column header's text. Specify -Icon (minus icon) to remove any existing icon.
IconRight: Puts the icon on the right side of the column rather than the left.
Data type options:
Float: For sorting purposes, indicates that this column contains floating point numbers (hexadecimal format is not supported). Sorting performance for Float and Text columns is up to 25 times slower than it is for integers.
Integer: For sorting purposes, indicates that this column contains integers. To be sorted properly, each integer must be 32-bit; that is, within the range -2147483648 to 2147483647. If any of the values are not integers, they will be considered zero when sorting (unless they start with a number, in which case that number is used). Numbers may appear in either decimal or hexadecimal format (e.g. 0xF9E0).
Text: Changes the column back to text-mode sorting, which is the initial default for every column. Only the first 8190 characters of text are significant for sorting purposes (except for the Logical option, in which case the limit is 4094).
Alignment options:
Center: Centers the text in the column. To center an Integer or Float column, specify the word Center after the word Integer or Float.
Left: Left-aligns the column's text, which is the initial default for every column. On older operating systems, the first column might have a forced left-alignment.
Right: Right-aligns the column's text. This attribute need not be specified for Integer and Float columns because they are right-aligned by default. That default can be overridden by specifying something such as "Integer Left" or "Float Center".
Sorting options:
Case: The sorting of the column is case-sensitive (affects only text columns). If the options Case, CaseLocale, and Logical are all omitted, the uppercase letters A-Z are considered identical to their lowercase counterparts for the purpose of the sort.
CaseLocale [v1.0.43.03+]: The sorting of the column is case-insensitive based on the current user's locale (affects only text columns). For example, most English and Western European locales treat the letters A-Z and ANSI letters like Ä and Ü as identical to their lowercase counterparts. This method also uses a "word sort", which treats hyphens and apostrophes in such a way that words like "coop" and "co-op" stay together.
Desc: Descending order. The column starts off in descending order the first time the user sorts it.
Logical [v1.0.44.12+]: Same as CaseLocale except that any sequences of digits in the text are treated as true numbers rather than mere characters. For example, the string "T33" would be considered greater than "T4". Logical requires Windows XP or later (on older OSes, CaseLocale is automatically used instead). In addition, Logical and Case are currently mutually exclusive: only the one most recently specified will be in effect.
NoSort: Prevents a user's click on this column from having any automatic sorting effect. To disable sorting for all columns rather than only a subset, include NoSort in the ListView's options. If the ListView has a g-label, the ColClick notification will still be received when the user clicks a no-sort column.
Sort: Immediately sorts the column in ascending order (even if it has the Desc option).
SortDesc: Immediately sorts the column in descending order.
Uni: Unidirectional sort. This prevents a second click on the same column from reversing the sort direction.
If omitted, the current header is left unchanged. Otherwise, specify the new header of the column.
On success, this function returns 1 (true). On failure, it returns 0 (false).
Inserts a new column at the specified column number.
ColumnNumber := LV_InsertCol(ColumnNumber , Options, ColumnTitle)
The number of the newly inserted column. Any column at or on the right side of ColumnNumber are shifted to the right to make room for the new column. The first column is 1 (not 0). If ColumnNumber is larger than the number of columns currently in the control, the new column is added next to the last column on the right side.
If omitted, the column always starts off at its defaults, such as whether or not it uses integer sorting. Otherwise, specify one or more options from the list above.
If blank or omitted, it defaults to an empty header. Otherwise, specify the header of the column.
On success, this function returns the new column's position number. On failure, it returns 0.
The newly inserted column starts off with empty contents beneath it unless it is the first column, in which case it inherits the old first column's contents and the old first column acquires blank contents.
The maximum number of columns in a ListView is 200.
Deletes the specified column and all of the contents beneath it.
IsDeleted := LV_DeleteCol(ColumnNumber)
The number of the column to delete. Once a column is deleted, the column numbers of any that lie to its right are reduced by 1. Consequently, calling LV_DeleteCol(2) twice would delete the second and third columns.
On success, this function returns 1 (true). On failure, it returns 0 (false). On operating systems older than Windows XP, attempting to delete the original first column might fail and return 0.
Returns the number of rows or columns in the control.
Count := LV_GetCount(Mode)
If blank or omitted, the function returns the total number of rows in the control. Otherwise, specify one of the following strings:
S or Selected: The count includes only the selected/highlighted rows.
Col or Column: The function returns the number of columns in the control.
This function returns the number of rows or columns in the control. The value is always returned immediately because the control keeps track of these counts.
This function is often used in the top line of a Loop, in which case the function would get called only once (prior to the first iteration). For example:
Loop % LV_GetCount()
{
    LV_GetText(RetrievedText, A_Index)
    if InStr(RetrievedText, "some filter text")
        LV_Modify(A_Index, "Select")  ; Select each row whose first field contains the filter-text.
}
To retrieve the widths of a ListView's columns -- for uses such as saving them to an INI file to be remembered between sessions -- follow this example:
Gui +LastFound
Loop % LV_GetCount("Column")
{
    SendMessage, 0x101D, A_Index - 1, 0, SysListView321  ; 0x101D is LVM_GETCOLUMNWIDTH.
    MsgBox Column %A_Index%'s width is %ErrorLevel%.
}
Returns the row number of the next selected, checked, or focused row.
RowNumber := LV_GetNext(StartingRowNumber, RowType)
If blank, omitted or less than 1, the search begins at the top of the list. Otherwise, specify the number of the row after which to begin the search.
If blank or omitted, the function searches for the next selected/highlighted row (see the example below). Otherwise, specify one of the following strings:
C or Checked: Find the next checked row.
F or Focused: Find the focused row. There is never more than one focused row in the entire list, and sometimes there is none at all.
This function returns the row number of the next selected, checked, or focused row. If none is found, it returns 0.
The following example reports all selected rows in the ListView:
RowNumber := 0  ; This causes the first loop iteration to start the search at the top of the list.
Loop
{
    RowNumber := LV_GetNext(RowNumber)  ; Resume the search at the row after that found by the previous iteration.
    if not RowNumber  ; The above returned zero, so there are no more selected rows.
        break
    LV_GetText(Text, RowNumber)
    MsgBox The next selected row is #%RowNumber%, whose first field is "%Text%".
}
An alternate method to find out if a particular row number is checked is the following:
Gui +LastFound
SendMessage, 0x102C, RowNumber - 1, 0xF000, SysListView321  ; 0x102C is LVM_GETITEMSTATE. 0xF000 is LVIS_STATEIMAGEMASK.
IsChecked := (ErrorLevel >> 12) - 1  ; This sets IsChecked to true if RowNumber is checked or false otherwise.
Retrieves the text at the specified row and column number.
IsRetrieved := LV_GetText(OutputVar, RowNumber , ColumnNumber)
The name of the output variable in which to store the retrieved text. Only up to 8191 characters are retrieved. On failure, it is made blank.
The number of the row whose text to be retrieved. If blank or 0, the column header text is retrieved.
If omitted, it defaults to 1 (the text in the first column). Otherwise, specify the number of the column where RowNumber is located.
On success, this function returns 1 (true). On failure, it returns 0 (false).
Column numbers seen by the script are not altered by any dragging and dropping of columns the user may have done. For example, the original first column is still number 1 even if the user drags it to the right of other columns.
Sets or replaces an ImageList for displaying icons.
PrevImageListID := LV_SetImageList(ImageListID , IconType)
The ID number returned from a previous call to IL_Create().
If omitted, the type of icons in the ImageList is detected automatically as large or small. Otherwise, specify 0 for large icons, 1 for small icons, or 2 for state icons (which are not yet directly supported, but could be used via SendMessage).
On success, this function returns the ImageList ID that was previously associated with the ListView. On failure, it returns 0. Any such detached ImageList should normally be destroyed via IL_Destroy().
This function is normally called prior to adding any rows to the ListView. It sets the ImageList whose icons will be displayed by the ListView's rows (and optionally, its columns).
A ListView may have up to two ImageLists: small-icon and/or large-icon. This is useful when the script allows the user to switch to and from the large-icon view. To add more than one ImageList to a ListView, call LV_SetImageList() a second time, specifying the ImageList ID of the second list. A ListView with both a large-icon and small-icon ImageList should ensure that both lists contain the icons in the same order. This is because the same ID number is used to reference both the large and small versions of a particular icon.
Although it is traditional for all viewing modes except Icon and Tile to show small icons, this can be overridden by passing a large-icon list to LV_SetImageList() and specifying 1 (small-icon) for the second parameter. This also increases the height of each row in the ListView to fit the large icon.
A g-label such as gMySubroutine may be listed in the control's options. This would cause the MySubroutine label to be launched automatically whenever the user performs an action in the control. This subroutine may consult the built-in variables A_Gui and A_GuiControl to find out which window and ListView generated the event. More importantly, it may consult A_GuiEvent, which contains one of the following strings or letters (for compatibility with future versions, a script should not assume these are the only possible values):
DoubleClick: The user has double-clicked within the control. The variable A_EventInfo contains the focused row number. LV_GetNext() can be used to instead get the first selected row number, which is 0 if the user double-clicked on empty space.
R: The user has double-right-clicked within the control. The variable A_EventInfo contains the focused row number.
ColClick: The user has clicked a column header. The variable A_EventInfo contains the column number, which is the original number assigned when the column was created; that is, it does not reflect any dragging and dropping of columns done by the user. One possible response to a column click is to sort by a hidden column (zero width) that contains data in a sort-friendly format (such as a YYYYMMDD integer date). Such a hidden column can mirror some other column that displays the same data in a more friendly format (such as MM/DD/YY). For example, a script could hide column 3 via LV_ModifyCol(3, 0), then disable automatic sorting in the visible column 2 via LV_ModifyCol(2, "NoSort"). Then in response to the ColClick notification for column 2, the script would sort the ListView by the hidden column via LV_ModifyCol(3, "Sort").
D: The user has attempted to start dragging a row or icon (there is currently no built-in support for dragging rows or icons). The variable A_EventInfo contains the focused row number. [v1.0.44+]: This notification occurs even without AltSubmit.
d (lowercase D): Same as above except a right-click-drag rather than a left-drag.
e (lowercase E): The user has finished editing the first field of a row (the user may edit it only when the ListView has -ReadOnly in its options). The variable A_EventInfo contains the row number.
If the ListView has the word AltSubmit in its options, its g-label is launched more often and A_GuiEvent may contain the following additional values:
Normal: The user has left-clicked a row. The variable A_EventInfo contains the focused row number.
RightClick: The user has right-clicked a row. The variable A_EventInfo contains the focused row number. In most cases, it is best not to display a menu in response to this. Instead, use the GuiContextMenu label because it also recognizes the Apps key. For example:
GuiContextMenu:  ; Launched in response to a right-click or press of the Apps key.
if (A_GuiControl != "MyListView")  ; This check is optional. It displays the menu only for clicks inside the ListView.
    return
; Show the menu at the provided coordinates, A_GuiX and A_GuiY. These should be used
; because they provide correct coordinates even if the user pressed the Apps key:
Menu, MyContextMenu, Show, %A_GuiX%, %A_GuiY%
return
A: A row has been activated, which by default occurs when it is double clicked. The variable A_EventInfo contains the row number.
C: The ListView has released mouse capture.
E: The user has begun editing the first field of a row (the user may edit it only when the ListView has -ReadOnly in its options). The variable A_EventInfo contains the row number.
F: The ListView has received keyboard focus.
f (lowercase F): The ListView has lost keyboard focus.
I: Item changed. A row has changed by becoming selected/deselected, checked/unchecked, etc. If the user selects a new row, at least two such notifications are received: one for the de-selection of the previous row, and one for the selection of the new row. [v1.0.44+]: The variable A_EventInfo contains the row number. [v1.0.46.10+]: ErrorLevel contains zero or more of the following letters to indicate how the item changed: S (select) or s (de-select), and/or F (focus) or f (de-focus), and/or C (checkmark) or c (uncheckmark). For example, SF means that the row has been selected and focused. To detect whether a particular letter is present, use a parsing loop or the case-sensitive option of InStr(); for example: InStr(ErrorLevel, "S", true). Note: For compatibility with future versions, a script should not assume that "SsFfCc" are the only possible letters. Also, specifying Critical as the g-label's first line ensures that all "I" notifications are received (otherwise, some might be lost if the script cannot keep up with them).
K: The user has pressed a key while the ListView has focus. A_EventInfo contains the virtual key code of the key, which is a number between 1 and 255. This can be translated to a key name or character via GetKeyName(). For example, key := GetKeyName(Format("vk{:x}", A_EventInfo)). On most keyboard layouts, keys A-Z can be translated to the corresponding character via Chr(A_EventInfo). F2 is received regardless of WantF2. However, Enter is not received; to receive it, use a default button as described below.
M: Marquee. The user has started to drag a selection-rectangle around a group of rows or icons.
S: The user has begun scrolling the ListView.
s (lowercase S): The user has finished scrolling the ListView.
An Image-List is a group of identically sized icons stored in memory. Upon creation, each ImageList is empty. The script calls IL_Add() repeatedly to add icons to the list, and each icon is assigned a sequential number starting at 1. This is the number to which the script refers to display a particular icon in a row or column header. Here is a working example that demonstrates how to put icons into a ListView's rows:
Gui, Add, ListView, h200 w180, Icon & Number|Description  ; Create a ListView.
ImageListID := IL_Create(10)  ; Create an ImageList to hold 10 small icons.
LV_SetImageList(ImageListID)  ; Assign the above ImageList to the current ListView.
Loop 10  ; Load the ImageList with a series of icons from the DLL.
    IL_Add(ImageListID, "shell32.dll", A_Index)
Loop 10  ; Add rows to the ListView (for demonstration purposes, one for each icon).
    LV_Add("Icon" . A_Index, A_Index, "n/a")
Gui Show
return

GuiClose:  ; Exit the script when the user closes the ListView's GUI window.
ExitApp
Creates a new ImageList that is initially empty.
ImageListID := IL_Create(InitialCount, GrowCount, LargeIcons)
If omitted, it defaults to 2. Otherwise, specify the number of icons you expect to put into the list immediately.
If omitted, it defaults to 5. Otherwise, specify the number of icons by which the list will grow each time it exceeds the current list capacity.
If omitted, it defaults to 0, meaning the ImageList will contain small icons. Otherwise, specify a non-zero value to make the ImageList contain large icons. Icons added to the list are scaled automatically to conform to the system's dimensions for small and large icons.
On success, this function returns the unique ID of the newly created ImageList. On failure, it returns 0.
Adds an icon or picture to the specified ImageList.
IconIndex := IL_Add(ImageListID, IconFileName , IconNumber)
IconIndex := IL_Add(ImageListID, PicFileName, MaskColor, Resize)
The ID number returned from a previous call to IL_Create().
The name of an icon (.ICO), cursor (.CUR), or animated cursor (.ANI) file (animated cursors will not actually be animated when displayed in a ListView). Other sources of icons include the following types of files: EXE, DLL, CPL, SCR, and other types that contain icon resources.
[v1.1.23+]: An icon handle can be used instead of a filename, e.g. HICON:%handle%.
If omitted, it defaults to 1 (the first icon group). Otherwise, specify the number of the icon group to be used in the file. If the number is negative, its absolute value is assumed to be the resource ID of an icon within an executable file. In the following example, the default icon from the second icon group would be used: IL_Add(ImageListID, "C:\My Application.exe", 2).
The name of a non-icon image such as BMP, GIF and JPG. On Windows XP or later, additional image formats such as PNG, TIF, Exif, WMF, and EMF are supported. Operating systems older than XP can be given support by copying Microsoft's free GDI+ DLL into the AutoHotkey.exe folder (but in the case of a compiled script, copy the DLL into the script's folder). To download the DLL, search for the following phrase at www.microsoft.com: gdi redistributable
[v1.1.23+]: A bitmap handle can be used instead of a filename, e.g. HBITMAP:%handle%.
The mask/transparency color number. 0xFFFFFF (the color white) might be best for most pictures.
Specify a non-zero value to cause the picture to be scaled to become a single icon, or zero to divide up the image into however many icons can fit into its actual width.
On success, this function returns the new icon's index (1 is the first icon, 2 is the second, and so on). On failure, it returns 0.
Deletes the specified ImageList.
IsDestroyed := IL_Destroy(ImageListID)
The ID number returned from a previous call to IL_Create().
On success, this function returns 1 (true). On failure, it returns 0 (false).
It is normally not necessary to destroy ImageLists because once attached to a ListView, they are destroyed automatically when the ListView or its parent window is destroyed. However, if the ListView shares ImageLists with other ListViews (by having 0x40 in its options), the script should explicitly destroy the ImageList after destroying all the ListViews that use it. Similarly, if the script replaces one of a ListView's old ImageLists with a new one, it should explicitly destroy the old one.
The Gui Submit command has no effect on a ListView control. Therefore, the script may use the ListView's associated variable (if any) to store other data without concern that it will ever be overwritten.
After a column is sorted -- either by means of the user clicking its header or the script calling LV_ModifyCol(1, "Sort") -- any subsequently added rows will appear at the bottom of the list rather than obeying the sort order. The exception to this is the Sort and SortDesc styles, which move newly added rows into the correct positions.
To detect when the user has pressed Enter while a ListView has focus, use a default button (which can be hidden if desired). For example:
Gui, Add, Button, Hidden Default, OK
...
ButtonOK:
GuiControlGet, FocusedControl, FocusV
if (FocusedControl != "MyListView")
    return
MsgBox % "Enter was pressed. The focused row number is " . LV_GetNext(0, "Focused")
return
In addition to navigating from row to row with the keyboard, the user may also perform incremental search by typing the first few characters of an item in the first column. This causes the selection to jump to the nearest matching row.
Although any length of text can be stored in each field of a ListView, only the first 260 characters are displayed.
Although the maximum number of rows in a ListView is limited only by available system memory, row-adding performance can be greatly improved as described in the Count option.
A picture may be used as a background around a ListView (that is, to frame the ListView). To do this, create the picture control after the ListView and include 0x4000000 (which is WS_CLIPSIBLINGS) in the picture's Options.
A script may create more than one ListView per window. To operate upon a ListView other than the default one, see built-in functions.
It is best not to insert or delete columns directly with SendMessage. This is because the program maintains a collection of sorting preferences for each column, which would then get out of sync. Instead, use the built-in column functions.
To perform actions such as resizing, hiding, or changing the font of a ListView, use GuiControl.
To extract text from external ListViews (those not owned by the script), use ControlGet List.
TreeView, Other Control Types, Gui, GuiContextMenu, GuiControl, GuiControlGet, ListView styles table
Selects or de-selects all rows by specifying 0 as the row number.
LV_Modify(0, "Select")   ; Select all.
LV_Modify(0, "-Select")  ; De-select all.
LV_Modify(0, "-Check")  ; Uncheck all the checkboxes.
Auto-sizes all columns to fit their contents.
LV_ModifyCol() ; There are no parameters in this mode.
The following is a working script that is more elaborate than the one near the top of this page. It displays the files in a folder chosen by the user, with each file assigned the icon associated with its type. The user can double-click a file, or right-click one or more files to display a context menu.
; Allow the user to maximize or drag-resize the window:
Gui +Resize

; Create some buttons:
Gui, Add, Button, Default gButtonLoadFolder, Load a folder
Gui, Add, Button, x+20 gButtonClear, Clear List
Gui, Add, Button, x+20, Switch View

; Create the ListView and its columns via Gui Add:
Gui, Add, ListView, xm r20 w700 vMyListView gMyListView, Name|In Folder|Size (KB)|Type
LV_ModifyCol(3, "Integer")  ; For sorting, indicate that the Size column is an integer.

; Create an ImageList so that the ListView can display some icons:
ImageListID1 := IL_Create(10)
ImageListID2 := IL_Create(10, 10, true)  ; A list of large icons to go with the small ones.

; Attach the ImageLists to the ListView so that it can later display the icons:
LV_SetImageList(ImageListID1)
LV_SetImageList(ImageListID2)

; Create a popup menu to be used as the context menu:
Menu, MyContextMenu, Add, Open, ContextOpenFile
Menu, MyContextMenu, Add, Properties, ContextProperties
Menu, MyContextMenu, Add, Clear from ListView, ContextClearRows
Menu, MyContextMenu, Default, Open  ; Make "Open" a bold font to indicate that double-click does the same thing.

; Display the window and return. The OS will notify the script whenever the user
; performs an eligible action:
Gui, Show
return


ButtonLoadFolder:
Gui +OwnDialogs  ; Forces user to dismiss the following dialog before using main window.
FileSelectFolder, Folder,, 3, Select a folder to read:
if not Folder  ; The user canceled the dialog.
    return

; Check if the last character of the folder name is a backslash, which happens for root
; directories such as C:\. If it is, remove it to prevent a double-backslash later on.
LastChar := SubStr(Folder, 0)
if (LastChar = "\")
    Folder := SubStr(Folder, 1, -1)  ; Remove the trailing backslash.

; Calculate buffer size required for SHFILEINFO structure.
sfi_size := A_PtrSize + 8 + (A_IsUnicode ? 680 : 340)
VarSetCapacity(sfi, sfi_size)

; Gather a list of file names from the selected folder and append them to the ListView:
GuiControl, -Redraw, MyListView  ; Improve performance by disabling redrawing during load.
Loop %Folder%\*.*
{
    FileName := A_LoopFileFullPath  ; Must save it to a writable variable for use below.

    ; Build a unique extension ID to avoid characters that are illegal in variable names,
    ; such as dashes. This unique ID method also performs better because finding an item
    ; in the array does not require search-loop.
    SplitPath, FileName,,, FileExt  ; Get the file's extension.
    if FileExt in EXE,ICO,ANI,CUR
    {
        ExtID := FileExt  ; Special ID as a placeholder.
        IconNumber := 0  ; Flag it as not found so that these types can each have a unique icon.
    }
    else  ; Some other extension/file-type, so calculate its unique ID.
    {
        ExtID := 0  ; Initialize to handle extensions that are shorter than others.
        Loop 7     ; Limit the extension to 7 characters so that it fits in a 64-bit value.
        {
            ExtChar := SubStr(FileExt, A_Index, 1)
            if not ExtChar  ; No more characters.
                break
            ; Derive a Unique ID by assigning a different bit position to each character:
            ExtID := ExtID | (Asc(ExtChar) << (8 * (A_Index - 1)))
        }
        ; Check if this file extension already has an icon in the ImageLists. If it does,
        ; several calls can be avoided and loading performance is greatly improved,
        ; especially for a folder containing hundreds of files:
        IconNumber := IconArray%ExtID%
    }
    if not IconNumber  ; There is not yet any icon for this extension, so load it.
    {
        ; Get the high-quality small-icon associated with this file extension:
        if not DllCall("Shell32\SHGetFileInfo" . (A_IsUnicode ? "W":"A"), "Str", FileName
            , "UInt", 0, "Ptr", &sfi, "UInt", sfi_size, "UInt", 0x101)  ; 0x101 is SHGFI_ICON+SHGFI_SMALLICON
            IconNumber := 9999999  ; Set it out of bounds to display a blank icon.
        else ; Icon successfully loaded.
        {
            ; Extract the hIcon member from the structure:
            hIcon := NumGet(sfi, 0)
            ; Add the HICON directly to the small-icon and large-icon lists.
            ; Below uses +1 to convert the returned index from zero-based to one-based:
            IconNumber := DllCall("ImageList_ReplaceIcon", "Ptr", ImageListID1, "Int", -1, "Ptr", hIcon) + 1
            DllCall("ImageList_ReplaceIcon", "Ptr", ImageListID2, "Int", -1, "Ptr", hIcon)
            ; Now that it's been copied into the ImageLists, the original should be destroyed:
            DllCall("DestroyIcon", "Ptr", hIcon)
            ; Cache the icon to save memory and improve loading performance:
            IconArray%ExtID% := IconNumber
        }
    }

    ; Create the new row in the ListView and assign it the icon number determined above:
    LV_Add("Icon" . IconNumber, A_LoopFileName, A_LoopFileDir, A_LoopFileSizeKB, FileExt)
}
GuiControl, +Redraw, MyListView  ; Re-enable redrawing (it was disabled above).
LV_ModifyCol()  ; Auto-size each column to fit its contents.
LV_ModifyCol(3, 60) ; Make the Size column at little wider to reveal its header.
return


ButtonClear:
LV_Delete()  ; Clear the ListView, but keep icon cache intact for simplicity.
return

ButtonSwitchView:
if not IconView
    GuiControl, +Icon, MyListView    ; Switch to icon view.
else
    GuiControl, +Report, MyListView  ; Switch back to details view.
IconView := not IconView             ; Invert in preparation for next time.
return

MyListView:
if (A_GuiEvent = "DoubleClick")  ; There are many other possible values the script can check.
{
    LV_GetText(FileName, A_EventInfo, 1) ; Get the text of the first field.
    LV_GetText(FileDir, A_EventInfo, 2)  ; Get the text of the second field.
    Run %FileDir%\%FileName%,, UseErrorLevel
    if ErrorLevel
        MsgBox Could not open "%FileDir%\%FileName%".
}
return

GuiContextMenu:  ; Launched in response to a right-click or press of the Apps key.
if (A_GuiControl != "MyListView")  ; Display the menu only for clicks inside the ListView.
    return
; Show the menu at the provided coordinates, A_GuiX and A_GuiY. These should be used
; because they provide correct coordinates even if the user pressed the Apps key:
Menu, MyContextMenu, Show, %A_GuiX%, %A_GuiY%
return

ContextOpenFile:  ; The user selected "Open" in the context menu.
ContextProperties:  ; The user selected "Properties" in the context menu.
; For simplicitly, operate upon only the focused row rather than all selected rows:
FocusedRowNumber := LV_GetNext(0, "F")  ; Find the focused row.
if not FocusedRowNumber  ; No row is focused.
    return
LV_GetText(FileName, FocusedRowNumber, 1) ; Get the text of the first field.
LV_GetText(FileDir, FocusedRowNumber, 2)  ; Get the text of the second field.
if InStr(A_ThisMenuItem, "Open")  ; User selected "Open" from the context menu.
    Run %FileDir%\%FileName%,, UseErrorLevel
else  ; User selected "Properties" from the context menu.
    Run Properties "%FileDir%\%FileName%",, UseErrorLevel
if ErrorLevel
    MsgBox Could not perform requested action on "%FileDir%\%FileName%".
return

ContextClearRows:  ; The user selected "Clear" in the context menu.
RowNumber := 0  ; This causes the first iteration to start the search at the top.
Loop
{
    ; Since deleting a row reduces the RowNumber of all other rows beneath it,
    ; subtract 1 so that the search includes the same row number that was previously
    ; found (in case adjacent rows are selected):
    RowNumber := LV_GetNext(RowNumber - 1)
    if not RowNumber  ; The above returned zero, so there are no more selected rows.
        break
    LV_Delete(RowNumber)  ; Clear the row from the ListView.
}
return

GuiSize:  ; Expand or shrink the ListView in response to the user's resizing of the window.
if (A_EventInfo = 1)  ; The window has been minimized. No action needed.
    return
; Otherwise, the window has been resized or maximized. Resize the ListView to match.
GuiControl, Move, MyListView, % "W" . (A_GuiWidth - 20) . " H" . (A_GuiHeight - 40)
return

GuiClose:  ; When the window is closed, exit the script automatically:
ExitApp